You can build hierarchies to enable drill and expand functionality in the data model. Hierarchies are built from multiple columns that reside in a single table. When the data model is built, the hierarchy is displayed in a folder within that table in the data model, so that it can be easily located. The hierarchy can then be added to queries, where users can navigate the different levels of the hierarchy, drilling down for a more detailed view, drilling up to see the big picture, or drilling to a specified level. Users can also expand levels of the hierarchies, to display multiple hierarchy levels together.
Hierarchy Types
There are two kinds of hierarchy that you can build: regular or drill path. Regular hierarchies are the type produces when connecting to OLAP, Tabular, and SAP data sources. When building a data model based on an SQL source, you can select either regular or drill path.
Both hierarchy types enable drill down via a single or double click (depending on your user settings) and drill up and drill across via the context menu. The main difference between the 2 hierarchy types is seen in the behavior of the expand and collapse functionality.
The Expand and collapse functions are used to show or hide child levels of the hierarchy alongside the parent level, without drill down. This allows you to see multiple levels of the hierarchy simultaneously.
Regular Hierarchies
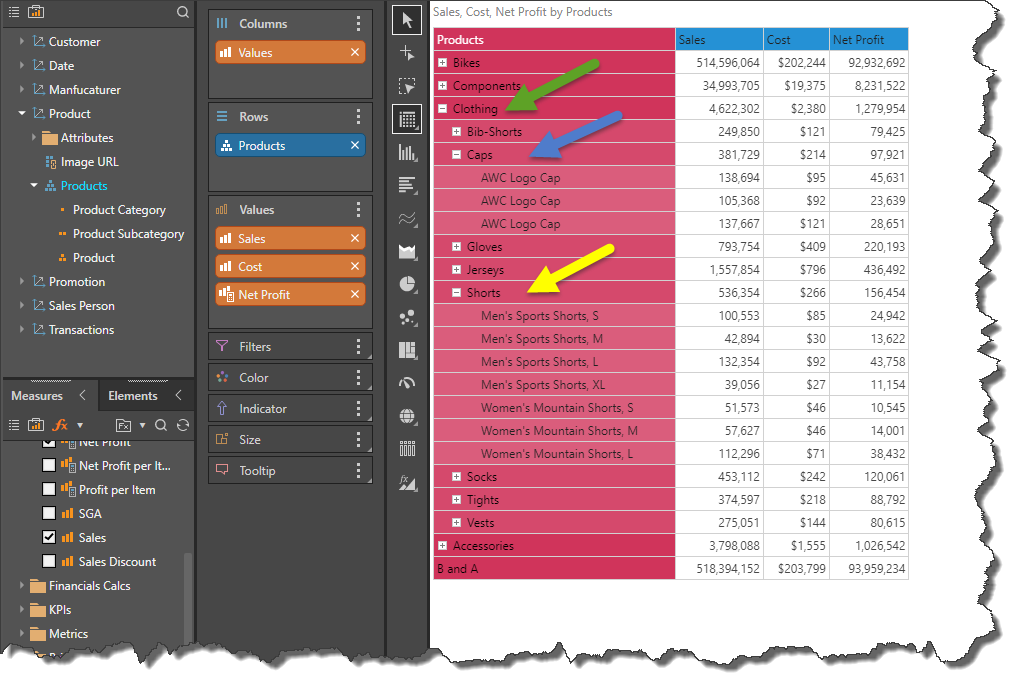
Regular hierarchies display the expand and collapse icons when working with grids, enabling you to easily show or hide various levels of the hierarchy, or only specified elements. You can expand the children or grandchildren of any specified level of the hierarchy; the expanded level will be displayed below the parent level.
- Click here to learn more about regular hierarchies.
Drill Path Hierarchies
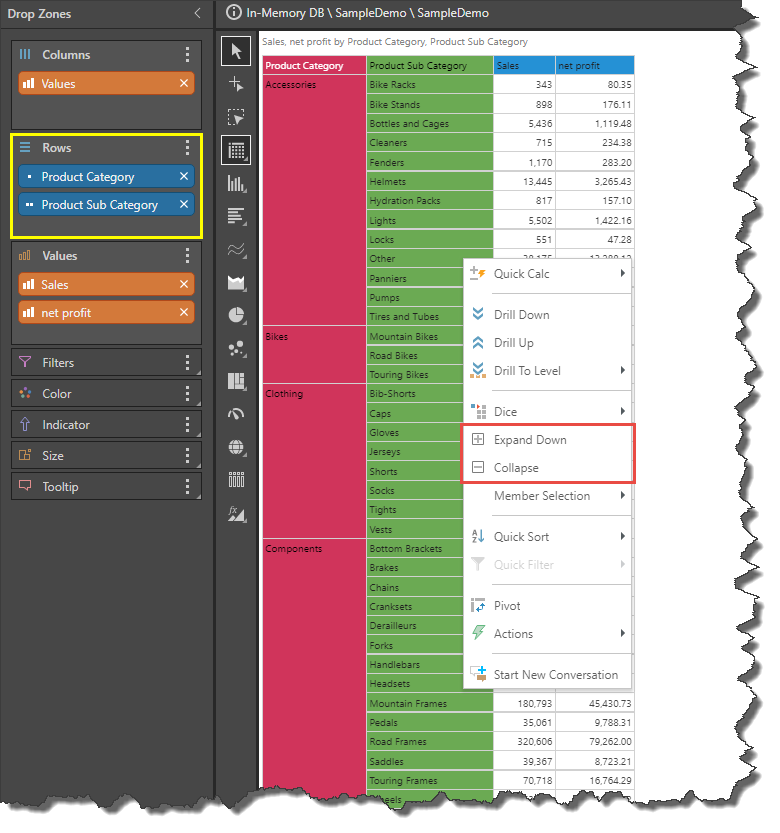
Drill path hierarchies also enable expand and collapse of lower levels of the hierarchy, but this functionality is accessed via the context menu. When expanded, all members of the next level of the hierarchy are displayed in a new column next to the parent level.
- Click here to learn more about drill path hierarchies.
Build a Hierarchy
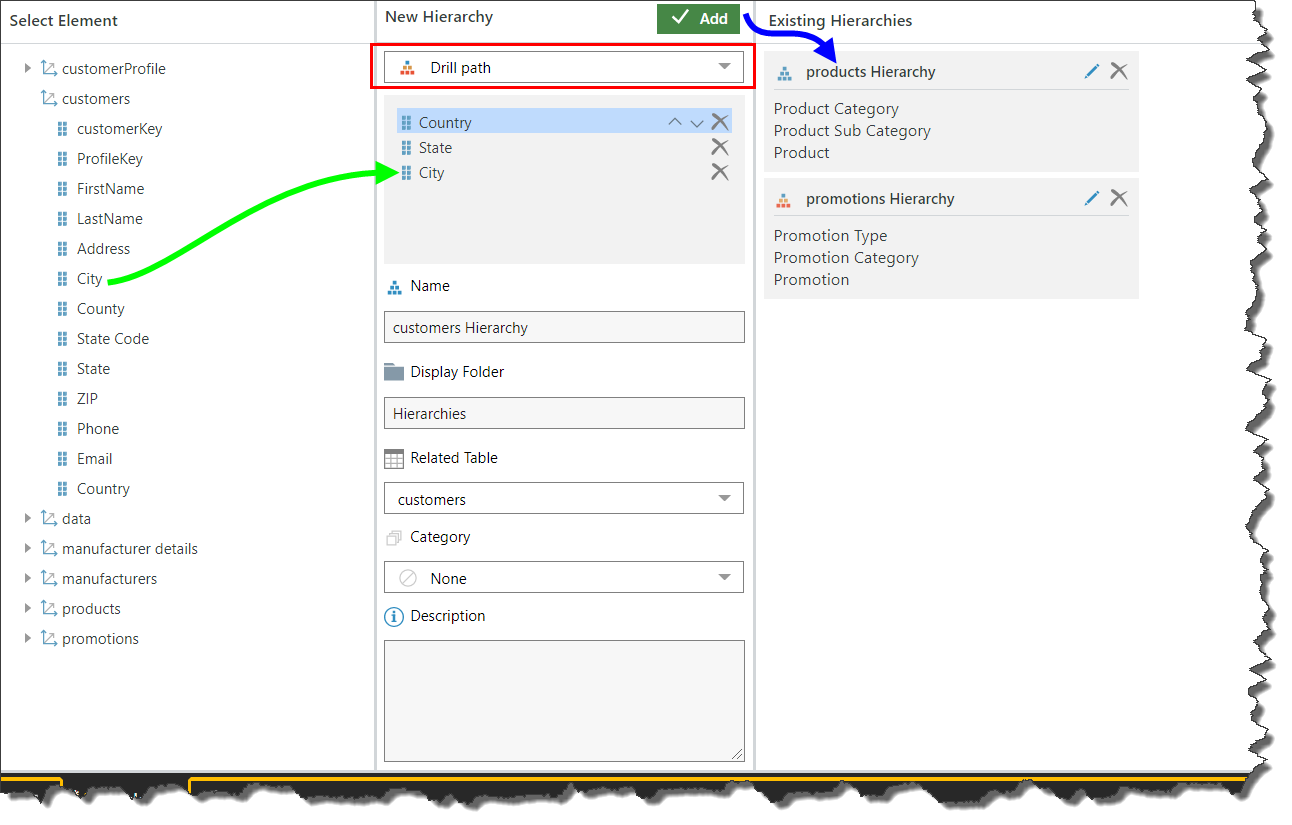
To build a hierarchy, work through the three panels: select elements, new hierarchy, and existing hierarchies.
Select Element
To build a hierarchy, start by expanding the table containing the columns you want to add to the hierarchy.
Add each of the required columns to the hierarchy widget; this can be done by double clicking on the column, or by dragging it and dropping it on the widget.
Arrange the columns in the correct drill order; the parent level should be at the top, and the lowest level should be at the bottom.
New Hierarchy
Under 'new hierarchy', set the hierarchy order and metadata for the new hierarchy.
Hierarchy Type
Select the required hierarchy type; regular or drill path (see above for details).
Include All Level
This option is available for regular hierarchies only. Enable this option to add a level called 'All' to the hierarchy from the Elements panel view. This level can then be selected to use the entire hierarchy as a background filter.
Name
Name the hierarchy. Pyramid will automatically name the hierarchy according to the name of its table. Change the name by entering a new name in this field.
Display Folder
Name the display folder where the hierarchy will be stored in the model. The default display folder name is Hierarchies, but you can change it by entering a different name in this field.
Related Table
This is the table where the hierarchy will be located in the model. This should be the table from where the hierarchy's columns are located.
Category
You can categorize a hierarchy a geospatial, date-time, or person.
Description
Add a description to the hierarchy is required.
Add
Click the Add button to confirm your hierarchy selection and metadata and move the hierarchy to the 'Existing Hierarchies' list.
Existing Hierarchies
Once you 'add' a hierarchy, it will appear under 'existing hierarchies'.
From there, click the edit icon to move the hierarchy back to the widget where it can be edited, or click the x to delete the hierarchy. Otherwise, simply continue to the next step.